Learn how to grow herbs indoors all year round — basil, mint, rosemary, chives, and more. This complete beginner’s guide covers light, watering, containers, and harvesting for thriving indoor herbs.
Fresh herbs change everything in the kitchen.
A handful of basil torn over a pasta dish. Fresh mint muddled into a summer drink. Chives snipped over scrambled eggs. Rosemary thrown into roasting potatoes. The difference between dried herbs from a jar and something you snipped from a living plant ten minutes ago is extraordinary — in flavour, in aroma, and in the simple satisfaction of having grown it yourself.
The best part? You don’t need a garden. You don’t even need an outdoor space. A sunny windowsill, a few pots, and a little know-how is all it takes to have fresh herbs available every single day of the year.
This guide covers everything you need to grow herbs indoors successfully — from choosing the right herbs and containers, to getting the light and watering right, to harvesting in a way that keeps your plants producing for months.
Let’s get growing.
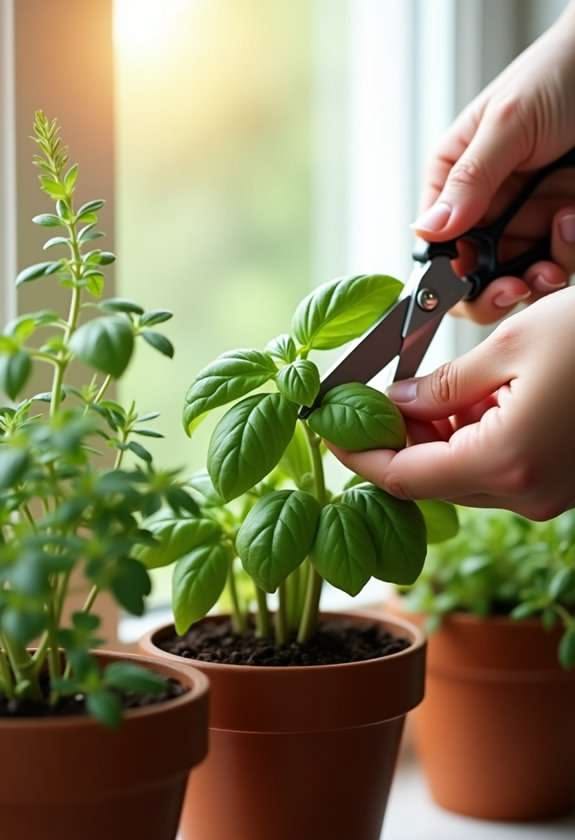
Table of Contents
- Why grow herbs indoors?
- The best herbs to grow indoors
- What you need to get started
- Choosing the right containers
- Light — the most important factor
- Soil and potting mix for indoor herbs
- Watering indoor herbs correctly
- Feeding your indoor herbs
- How to harvest herbs to keep them producing
- Growing herbs from seed vs buying plants
- Common indoor herb problems and fixes
- The best herbs for each room
1. Why Grow Herbs Indoors?
Growing herbs indoors is one of the most practical and rewarding things a beginner can do — and here’s why it deserves a spot at the very top of your list.
They’re useful every single day. Unlike vegetables that produce a harvest once or twice a season, herbs are a living pantry you dip into constantly. A pot of basil on the kitchen windowsill gets used far more often than a vegetable patch outside.
They’re incredibly forgiving. Many herbs are almost impossible to kill — mint, chives, and rosemary in particular will survive considerable neglect and bounce back from mistakes that would finish off more delicate plants.
They save you money immediately. Those small plastic-wrapped herb packets from the supermarket are expensive, short-lived, and often half-dead by the time you get them home. A single pot of chives on your windowsill, grown from a £1 packet of seeds, will provide you with fresh herbs for years.
They make your home smell wonderful. Running your fingers through a pot of basil or brushing past a rosemary plant releases an incredible fragrance. Herbs are one of the most sensory plants you can grow indoors.
They’re a perfect starting point. If you’ve never grown anything before and you’re not ready for a full vegetable garden, herbs are the ideal entry point. Small, manageable, immediately useful, and genuinely hard to fail at.
2. The Best Herbs to Grow Indoors {#best-herbs}
Not all herbs thrive equally well indoors. Some love the warm, sheltered conditions of a kitchen windowsill. Others struggle without the air circulation and intensity of natural outdoor light.
Here are the best performers for indoor growing:
Basil — the kitchen windowsill classic
Basil is the most popular indoor herb for good reason. It loves warmth, thrives on a sunny south-facing windowsill, and is used constantly in cooking — pasta sauces, salads, pizzas, pesto.
It does need good light and consistent warmth. Cold draughts are its nemesis — keep it away from windows that let in cold air and never let it sit on a cold windowsill in winter.
Difficulty: Easy Light needed: Full sun (south-facing windowsill ideal) Key tip: Pinch out flower buds the moment they appear — once basil flowers, the leaves lose flavour rapidly.
Mint — the practically unkillable herb
Mint is one of the toughest plants you can grow indoors. It tolerates lower light levels than most herbs, recovers from neglect, and produces an abundance of aromatic leaves for months on end.
The one golden rule with mint: always grow it in its own pot. In a garden, mint spreads aggressively via underground runners and takes over everything. In a pot indoors, it stays contained — but mix it with other herbs and it will crowd them out.
Difficulty: Very easy Light needed: Partial sun — tolerates lower light than most Key tip: Keep it in its own pot and harvest regularly to keep it bushy rather than leggy.
Chives — the easiest herb you can grow
Chives are arguably the most foolproof herb for indoor growing. They tolerate a wide range of conditions, grow back quickly after harvesting, and are useful in so many dishes — eggs, salads, soups, potatoes, cream cheese.
They also produce beautiful purple flowers in summer that are edible and make a stunning garnish.
Difficulty: Very easy Light needed: Full to partial sun Key tip: Cut right down to about 2–3cm from the base when harvesting — they’ll regrow vigorously within days.
Rosemary — the Mediterranean sun lover
Rosemary is one of the most drought-tolerant herbs you can grow and one of the most commonly killed through overwatering. It wants to dry out between waterings. Treat it like a Mediterranean plant enjoying a hot summer — lots of sun, very little fuss, not much water.
Difficulty: Easy (once you understand its watering needs) Light needed: Full sun — needs the brightest spot you have Key tip: Never let it sit in water. Drainage is critical. This is the most common cause of rosemary death indoors.
Thyme — compact, tough, and useful
Like rosemary, thyme is a Mediterranean herb that loves sun and hates having wet roots. It’s compact, slow-growing, and extremely useful in the kitchen — roast chicken, soups, stews, and sauces all benefit enormously from fresh thyme.
Difficulty: Easy Light needed: Full sun Key tip: Harvest little and often from the tips of stems — this keeps the plant compact and prevents it becoming woody.
Parsley — the slow but reliable workhorse
Parsley is slower to establish than most herbs but once it’s going it’s extremely productive and long-lasting. It tolerates lower light levels reasonably well, making it one of the better choices for windowsills that don’t get full sun all day.
There are two main types: curly parsley (milder, decorative) and flat-leaf parsley (stronger flavour, better for cooking). Flat-leaf is generally considered to have better flavour.
Difficulty: Easy, but slow to start Light needed: Full to partial sun Key tip: Parsley is a biennial — it grows leaves in year one and goes to seed in year two. Start a fresh pot each year.
Coriander (Cilantro) — fast growing, needs managing
Coriander is one of the most popular culinary herbs in the world and grows quickly indoors — but it has a strong tendency to “bolt” (go to seed and stop producing leaves) particularly in warm conditions or when pot-bound.
The trick with coriander is to sow a small pinch of seeds every 3–4 weeks for a continuous supply, rather than trying to keep one plant going indefinitely.
Difficulty: Moderate Light needed: Full to partial sun, cooler position preferred Key tip: Sow little and often. When it bolts, let it go to seed — coriander seeds are a spice in their own right.
Lemon Balm — the underrated gem
Lemon balm is massively underrated as an indoor herb. It grows vigorously, tolerates lower light than most, and produces a beautiful lemon fragrance that fills the room. Use it in teas, desserts, cocktails, and as a fresh garnish.
Difficulty: Very easy Light needed: Partial sun Key tip: Harvest frequently to prevent it becoming too large and leggy.
3. What You Need to Get Started {#what-you-need}
Starting an indoor herb garden requires very little. Here’s your basic kit:
Pots — Individual pots for each herb, with drainage holes. Size matters — see the containers section below.
Saucers — To catch water draining from pots and protect your windowsill.
Potting compost — A quality peat-free potting compost. Not garden soil — it compacts in containers and drains poorly.
Perlite or horticultural grit — Mixed into compost to improve drainage. Particularly important for Mediterranean herbs like rosemary and thyme.
Watering can — A small indoor watering can with a long spout gives you control over where the water goes.
Seeds or young plants — See the seeds vs. plants section below.
Kitchen scissors or small snips — For harvesting cleanly without tearing stems.
That’s genuinely all you need to start. Total cost for a basic setup: very little. And the herbs pay for themselves within the first few weeks of use.
4. Choosing the Right Containers {#containers}
Container choice matters more than most beginners realise — both for the health of your herbs and for how your windowsill looks.
Size
Bigger pots are almost always better. Small pots dry out quickly, restrict root growth, and need more frequent watering. As a general guide:
- Small herbs (chives, thyme, compact basil): Minimum 15cm diameter pot
- Medium herbs (parsley, coriander, mint): Minimum 20cm diameter pot
- Large herbs (rosemary, large basil, lemon balm): Minimum 25cm diameter pot
Drainage holes are non-negotiable
Every pot must have drainage holes at the bottom. Herbs sitting in stagnant water develop root rot — one of the most common ways indoor herbs die. If you fall in love with a decorative pot that has no drainage holes, use it as an outer sleeve and place a smaller pot with drainage holes inside it.
Materials
Terracotta pots — Beautiful, breathable (walls allow air exchange, which roots love), and heavy enough not to tip over. The downside: they dry out faster than plastic, so you’ll water more frequently. Perfect for Mediterranean herbs that like drying out.
Plastic pots — Lightweight, retain moisture longer, and cheap. Better for moisture-loving herbs like basil, mint, and parsley. Less attractive but very practical.
Ceramic pots — Somewhere between terracotta and plastic. Heavier, decorative, and retain moisture reasonably well. Check they have drainage holes — many decorative ceramics don’t.
Window boxes and troughs
A long window box can house several herbs in a row and looks beautiful on a windowsill. Just make sure each herb gets enough root space and that the box has adequate drainage. The main challenge: herbs have very different watering needs, so avoid putting rosemary (dry) next to basil (moist) in the same container.
5. Light — The Most Important Factor {#light}
If there is one factor that determines success or failure with indoor herbs more than any other, it’s light.
Most culinary herbs are plants of open, sunny environments — Mediterranean hillsides, sunny gardens, open fields. They are adapted to high light intensities. Indoors, even on a bright windowsill, light levels are significantly lower than outside.
Which windowsill is best?
South-facing windowsill — The best position for almost all herbs. Gets the most light for the longest part of the day. Ideal for basil, rosemary, thyme, and most Mediterranean herbs.
East-facing windowsill — Good morning light, shadier in the afternoon. Works well for mint, parsley, chives, and coriander — herbs that prefer not to bake in afternoon sun.
West-facing windowsill — Afternoon and evening sun. Similar to east-facing in terms of total light. Works for most herbs.
North-facing windowsill — The most challenging for herbs. Light is too low for Mediterranean herbs. Mint, parsley, and chives will survive; basil and rosemary will struggle.
Signs your herbs need more light
- Leggy, stretched growth with long gaps between leaves
- Pale, yellowing leaves
- Leaning strongly toward the light source
- Slow growth and poor flavour
What to do if you don’t have a sunny windowsill
Grow lights are the solution — and they’ve become remarkably affordable and effective in recent years. A simple LED grow light (available for £15–30 online) positioned 15–30cm above your herbs for 12–16 hours a day completely compensates for low natural light.
This opens up herb growing to apartments, north-facing rooms, and anyone who wants to grow herbs in a kitchen that doesn’t have a bright window.
6. Soil and Potting Mix for Indoor Herbs {#soil}
The right growing medium makes an enormous difference to the health of indoor herbs.
Never use garden soil indoors
Garden soil compacts badly in containers, drains poorly, and often contains weed seeds and pests. Always use a quality potting compost for indoor herbs.
The right mix for different herbs
For Mediterranean herbs (rosemary, thyme, oregano, sage): Mix approximately 70% peat-free potting compost with 30% perlite or horticultural grit. This produces a fast-draining mix that mimics the lean, well-drained soils these plants evolved in. They actively prefer slightly poorer soil — too rich a mix produces soft, flavour-poor growth.
For leafy herbs (basil, mint, parsley, chives, coriander): A quality peat-free potting compost on its own, or with a small addition of perlite (20%) for drainage, works well. These herbs prefer a richer, moisture-retentive mix.
Refresh compost annually
Potting compost becomes depleted and compacted over time. Repot your herbs into fresh compost every 12–18 months to keep them growing vigorously. Choose a pot one size larger each time, or trim the roots slightly and return to the same pot with fresh compost.
7. Watering Indoor Herbs Correctly {#watering}
Overwatering is the single most common cause of indoor herb death. More herbs are killed by too much water than too little — and it’s usually well-meaning beginners who water on a schedule (“water once a week”) rather than checking what the plant actually needs.
The finger test
Before watering any herb, push your finger about 2cm into the compost. Then apply this simple rule:
Mediterranean herbs (rosemary, thyme, oregano, sage): Water only when the compost is completely dry at 2cm depth — and even then, water thoroughly and let it drain completely. Never let these herbs sit in water.
Leafy herbs (basil, mint, parsley, chives): Water when the top 1cm of compost feels dry. These prefer consistently moist (not wet) conditions.
Coriander: Keep evenly moist but never waterlogged — it bolts faster when stressed by drought.
How to water
Water thoroughly — enough that water drains out of the bottom of the pot. This ensures the entire root zone gets moisture and prevents salt build-up in the compost.
After watering, empty the saucer after 30 minutes. Herbs left sitting in water develop root rot very quickly.
Water temperature
Always use room temperature water. Cold water straight from the tap shocks warm-loving herbs like basil and can cause leaf drop and blackening.
Signs of overwatering
- Yellow leaves, particularly lower leaves
- Soft, mushy stems at the base
- Mouldy compost surface
- Wilting despite wet compost (root rot has set in)
Signs of underwatering
- Wilting leaves that perk up after watering
- Dry, pulling away from the sides of the pot compost
- Brown, crispy leaf edges
- Very light pot when lifted
8. Feeding Your Indoor Herbs {#feeding}
Indoor herbs in containers need supplemental feeding because nutrients in potting compost run out after 4–6 weeks.
What to use
Liquid seaweed extract — an excellent all-round feed for herbs. Gentle, organic, and provides a good range of nutrients and trace elements. Feed every 2–4 weeks during the growing season.
Balanced liquid fertiliser — a general-purpose liquid feed diluted to half the recommended strength works well for leafy herbs. Full strength can produce overly soft, flavourless growth.
Worm castings — mix a small amount into compost when repotting. Slow-release and incredibly gentle — one of the best natural fertilisers for herbs.
What not to use
Avoid high-nitrogen fertilisers for Mediterranean herbs — they produce lots of lush but flavourless growth and make plants more susceptible to disease. Less is genuinely more when it comes to feeding rosemary, thyme, and oregano.
When to feed
Feed during the active growing season — spring through early autumn. Reduce or stop feeding entirely in winter when growth slows down. Feeding a slow-growing winter plant can cause problems rather than helping.
9. How to Harvest Herbs to Keep Them Producing {#harvesting}
This is where many beginners go wrong — and getting it right makes the difference between a herb plant that lasts for months and one that gives up within weeks.
The golden rule: harvest little and often
Regular harvesting actually stimulates herbs to produce more growth. A lightly and regularly harvested plant stays bushy, compact, and productive for far longer than one that’s left to grow and then stripped heavily in one go.
Aim to harvest a little from each plant every 1–2 weeks, even if you don’t need it — snip a few stems and add them to whatever you’re cooking. This keeps the plant actively producing.
How to harvest each herb
Basil: Always pinch or cut stems just above a pair of leaves. New growth will emerge from just below the cut, keeping the plant bushy. Never strip from the base upward — always work from the top down. Remove flower buds the moment they appear.
Mint: Cut stems down to about a third of their height. Mint regrows vigorously and can be harvested quite hard. Cut the whole plant back to 5cm in mid-season if it becomes leggy — it will bounce back with fresh, bushy growth.
Chives: Cut the whole clump down to 2–3cm from the base with scissors. This sounds drastic but chives regrow extremely quickly — you’ll have a full plant again within 2–3 weeks.
Rosemary: Snip soft stem tips — the newest growth at the ends of branches. Never cut back into old, woody growth — rosemary doesn’t regenerate from bare wood.
Thyme: Snip stem tips regularly. Like rosemary, avoid cutting back into old woody growth. Strip leaves from stems by running your fingers down from tip to base.
Parsley: Always harvest outer stems first, leaving the inner growth to continue developing. Cut stems right at the base rather than snipping halfway up.
Coriander: Harvest outer leaves and stems first. Once it starts to bolt (sending up a tall flower stem), harvest everything and start a fresh pot from seed.
Dealing with flowering (bolting)
When herbs flower, they redirect energy from leaf production into seed production — and leaf quality and quantity drops dramatically. As soon as you see flower buds forming:
- Pinch them out immediately to delay bolting
- With basil and coriander especially, this buys you several more weeks of productive leaf growth
- Once flowering is well underway, it’s usually best to harvest everything, let the plant set seed if you want to collect seeds, then start fresh
10. Growing Herbs from Seed vs Buying Plants {#seed-vs-plant}
Both approaches have their place — here’s how to decide.
Buy plants if…
- You want herbs immediately (plants from a garden centre are ready to use within days)
- You want just one or two plants of a particular herb
- You’re growing rosemary, thyme, or mint — these are slow from seed and cheap to buy as established plants
- You’re new to growing and want guaranteed success
Grow from seed if…
- You want a continuous supply (especially coriander and basil — sow every few weeks)
- You want more unusual varieties not available at garden centres
- You want to save money — a packet of seeds costs less than a single plant and contains 50–100 seeds
- You want the full satisfaction of growing from the very beginning
Rescuing supermarket herbs
Supermarket herb plants are typically several seedlings crammed into a tiny pot under intense growing conditions. They look lush in the shop but often struggle at home.
You can rescue them with this technique:
- Gently remove the plant from its pot
- Tease apart the root ball and separate into 3–4 clumps of seedlings
- Pot each clump into its own larger pot with fresh compost
- Water gently and place in a bright spot
- Within 2–3 weeks, each clump will have established and started growing vigorously
This turns one supermarket herb pot into 3–4 long-lasting plants — dramatically better value and far better longevity.
11. Common Indoor Herb Problems and Fixes {#problems}
Leggy, stretched growth
Cause: Not enough light. Fix: Move to a brighter windowsill or add a grow light. Prune back leggy growth to encourage bushy regrowth.
Yellow leaves
Cause: Most commonly overwatering. Can also be low light, cold temperatures, or nutrient deficiency. Fix: Check your watering — let compost dry appropriately before watering again. Check the position and temperature.
Basil leaves turning black
Cause: Cold temperatures or cold draughts — basil is extremely sensitive to cold. Fix: Move away from cold windowsills, especially in winter. Never let basil sit on a cold surface. Keep above 15°C at all times.
Mint becoming leggy and sparse
Cause: Not harvested regularly enough, or needs repotting. Fix: Cut the whole plant back hard to 5cm. It will regrow bushier and more vigorously. Repot into fresh compost if roots are filling the pot.
Rosemary dropping needles and dying
Cause: Almost certainly overwatering and/or poor drainage — the most common rosemary killer. Fix: Check roots — if brown and mushy, root rot has set in and the plant may be beyond saving. In future, water only when completely dry and ensure excellent drainage.
White powdery coating on leaves (powdery mildew)
Cause: Fungal disease encouraged by poor air circulation and high humidity. Fix: Remove affected leaves. Improve air circulation — don’t crowd plants together. Water at the base, not over leaves. A spray of diluted milk (1 part milk to 9 parts water) applied to leaves can help control mild cases.
Tiny flies around herb pots (fungus gnats)
Cause: Overwatering — fungus gnats lay eggs in moist compost. Fix: Let compost dry out more between waterings. Place yellow sticky traps near plants to catch adult flies. Water from below (in a saucer) to keep the surface dry.
12. The Best Herbs for Each Room {#by-room}
Kitchen windowsill (south or east-facing)
The classic location. Best herbs: basil, chives, parsley, thyme, and coriander. Everything you need for daily cooking within arm’s reach of the stove.
Living room (south-facing windowsill)
Rosemary makes a beautiful structural plant in a living room — fragrant, evergreen, and architecturally interesting. Lemon balm and mint also work well and smell wonderful.
Bathroom (if there’s a window)
Surprisingly good for humidity-loving herbs. Mint in particular thrives in the slightly higher humidity of a bathroom. Lemon balm also does well.
Home office
A pot of lemon balm on your desk has been shown in studies to reduce stress and improve focus. Mint is similarly energising. Both tolerate moderate light levels and need only occasional watering.
Under grow lights (anywhere in the home)
With a grow light, you can grow virtually any herb anywhere — no natural light required. This is the best solution for dark apartments, north-facing rooms, or anyone who wants a serious indoor herb setup.
Final Thoughts
A windowsill herb garden is one of the most rewarding, practical, and accessible things you can grow as a beginner — and once you start, you’ll wonder how you ever cooked without fresh herbs at your fingertips.
Start with two or three herbs — basil, chives, and mint are an ideal beginner trio. Learn what they need, get into the rhythm of harvesting regularly, and enjoy the incredible difference fresh herbs make in your cooking every single day.
Then add more. Before long, you’ll have a thriving collection of plants that feed your kitchen, scent your home, and give you the quiet daily satisfaction that only growing something yourself can provide.
Happy growing, Sajjad
Read these next:
- How to start a vegetable garden from scratch
- 10 easiest vegetables to grow at home
- Container gardening 101: grow food on a balcony or small space
- How to grow basil at home (and keep it alive)