Learn exactly how to grow aloe vera at home in 2025 — the right soil, light, watering, and care tips to keep your plant thriving for years. Plus how to harvest gel, propagate pups, and fix common problems.
There is a reason aloe vera is one of the most popular houseplants in the world.
It’s beautiful. It’s useful. It’s almost impossible to kill through neglect. And once you know how to grow aloe vera at home correctly, a single plant can thrive for decades — producing free gel for your skin, multiplying into new plants you can share, and purifying your indoor air quietly in the background.
The catch? Most people who learn how to grow aloe vera at home make the same handful of mistakes — usually overwatering, or putting the plant in the wrong spot. Understanding what aloe vera actually needs (which is quite different from most houseplants) makes the difference between a plant that struggles and one that thrives for twenty years.
Aloe vera is native to Africa, a perennial succulent that thrives in poor and sandy soil conditions. Given the proper care and growing conditions, an indoor aloe vera plant can live over ten years.
This complete guide covers everything you need to know about how to grow aloe vera at home — from choosing the right pot and soil, to watering correctly, harvesting the gel, propagating pups, and fixing every common problem.

Table of Contents
- Why grow aloe vera at home?
- Understanding aloe vera — what kind of plant it is
- Choosing the right pot
- The perfect soil mix
- Light requirements
- How to plant aloe vera step by step
- How to water aloe vera correctly
- Temperature and humidity
- Feeding your aloe vera
- How to harvest aloe vera gel at home
- How to propagate aloe vera from pups
- When and how to repot
- Common aloe vera problems and fixes
- Growing aloe vera outdoors
- Aloe vera uses at home
1. Why Grow Aloe Vera at Home? {#why-grow}
Learning how to grow aloe vera at home is one of the best decisions a beginner plant owner can make. Here’s why this plant earns its place in so many homes worldwide:
It’s your own first aid kit
Aloe vera is also known as the first aid plant, as its sap is used to soothe burns, scalds, sunburn, skin irritations and insect bites. Cut away a leaf at the base, cut down its length and rub the sap directly on to skin. Having a plant at home means you always have fresh, natural gel on hand — no need to buy expensive skincare products.
It purifies your bedroom air at night
One of the most compelling reasons to learn how to grow aloe vera at home is its unique air-purifying quality. Unlike most houseplants, aloe vera uses CAM photosynthesis — releasing oxygen at night rather than during the day. This makes it one of the best plants to keep in a bedroom, gently enriching the air you breathe while you sleep.
NASA research identified aloe vera as one of the top plants for removing formaldehyde and benzene from indoor air — common pollutants from furniture, cleaning products, and synthetic fabrics.
It thrives on neglect
Aloe vera is one of the most well-loved and commonly grown houseplants out there. That’s probably because it’s attractive, useful, and low maintenance. Actually, it’s beyond low-maintenance. This plant thrives on neglect.
If you’ve struggled to keep plants alive before, aloe vera is your redemption plant. It stores water in its thick, fleshy leaves — meaning it can survive weeks without attention and still bounce back beautifully.
It multiplies for free
Once you know how to grow aloe vera at home, one plant becomes many. Aloe vera regularly produces “pups” — baby plants around the base of the mother — that can be carefully separated and potted into new plants. A single healthy aloe bought for a few pounds can provide you with plants to fill your home and give away to friends for years.
It lives for decades
A single, healthy aloe “mother” can produce pups for many years. But for that, you have to give the mother everything she needs. Learning how to grow aloe vera at home properly means investing in a plant that will reward you for twenty years or more.
2. Understanding Aloe Vera — What Kind of Plant It Is {#understanding}
Before diving into how to grow aloe vera at home, it helps to understand what kind of plant you’re dealing with — because aloe vera’s needs are quite different from most houseplants.
Aloe vera is a succulent — a plant evolved to survive in hot, dry, arid environments with very little rainfall, intense sunlight, and poor, fast-draining soil. Think the deserts and semi-arid regions of Africa and the Arabian Peninsula.
This evolutionary background explains everything about how to grow aloe vera at home:
- It stores water in its leaves — so it doesn’t need frequent watering
- It prefers poor, sandy soil — rich, water-retentive compost suffocates it
- It loves bright light — shady spots make it stretch and weaken
- It hates wet roots — overwatering is the number one cause of aloe vera death
- It is dormant in winter — needs even less water when growth slows
Keep this picture in mind — a plant built for heat, drought, and brilliant sun — and how to grow aloe vera at home becomes entirely logical.
3. Choosing the Right Pot {#pot}
The pot you choose is one of the most important decisions when learning how to grow aloe vera at home. The wrong pot leads directly to the most common aloe killer: overwatering and root rot.
Material matters enormously
A terracotta pot is ideal for an aloe vera — it is porous, so allows the soil to dry out between watering. Ensure that it has a drainage hole.
Terracotta is the gold standard for growing aloe vera at home. Its porous walls allow moisture to evaporate through the sides of the pot — dramatically reducing the risk of the waterlogged conditions that cause root rot. If you use a plastic or glazed ceramic pot, you must be even more careful with watering.
Size is critical
Bigger is not better when it comes to aloe vera pots. Pots that are too roomy tend to stay wetter for longer, because there’s not enough plant in there to take up the available water. With aloe, if the roots stay wet, the plant’s metabolism slows, it becomes stressed, and root rot can set in very quickly.
Choose a pot that’s the same size as the root ball. When repotting, go only one size larger than the current pot. This keeps the soil-to-root ratio right — the plant uses up available moisture before it can pool around the roots.
Drainage holes are non-negotiable
Every pot you use to grow aloe vera at home must have at least one large drainage hole at the bottom. No drainage hole = guaranteed root rot, regardless of how carefully you water.
4. The Perfect Soil Mix {#soil}
Getting the soil right is the second most important factor in how to grow aloe vera at home successfully. Aloe vera planted in the wrong compost will struggle regardless of how well you tend it.
What aloe vera needs from its soil
Aloe plants thrive in poor, rocky, extremely well-draining soil. In fact, soil that retains moisture very much at all is likely to kill them. They’ll perform best in specialized cactus or succulent potting mix.
The key word is drainage. Aloe vera roots need to dry out between waterings — compost that holds moisture keeps roots permanently damp, which leads directly to root rot.
The best ready-made option
A specialist cactus and succulent potting mix is the easiest solution for learning how to grow aloe vera at home. Available at most garden centres and online, these mixes are formulated to drain quickly and replicate the fast-draining soils of aloe’s natural habitat.
Make your own mix
It’s possible to use standard potting soil, but you’ll need to mix in an equal amount of sand or perlite to increase the drainage.
An excellent homemade mix for growing aloe vera at home:
- 1 part peat-free multipurpose compost
- 1 part perlite (improves drainage and aeration)
- 1 part horticultural grit or coarse sand (replicates aloe’s natural gravelly soil)
You can also make your own mix — one part coconut coir, one part potting soil, one part pumice, and one part perlite or vermiculite works very well.
Top dressing trick
You could top the compost with a layer of grit — this will keep the base of the plant dry and will prevent it rotting. A 1–2cm layer of horticultural grit on the surface around the stem is a simple, effective way to prevent the crown of the plant sitting in damp compost.
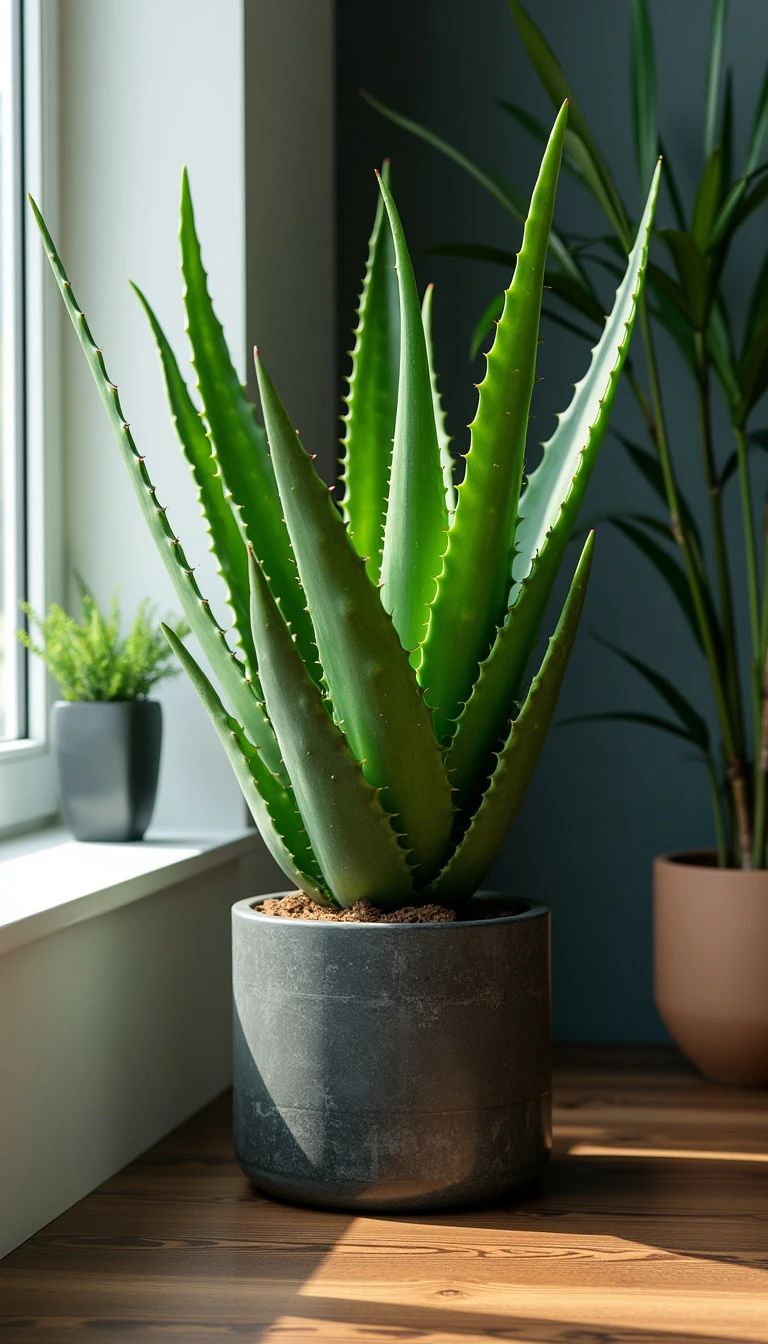
5. Light Requirements {#light}
Light is one of the areas where how to grow aloe vera at home differs most from other popular houseplants.
How much light does aloe vera need?
Aloe vera needs full sun — that means at least 6 hours per day of direct light. If you’re keeping yours as a houseplant, place it in a south-facing window.
This is significantly more light than most houseplants require. Aloe vera evolved in open, sun-drenched environments — it genuinely wants as much light as your home can provide.
What happens without enough light
Aloe that are kept in low light often grow leggy. Without sufficient light, aloe vera stretches toward the nearest light source, becomes pale, loses its compact rosette shape, and weakens significantly. A struggling aloe in low light is also more susceptible to overwatering problems because its reduced growth rate means it uses water more slowly.
Best windowsill positions
South-facing windowsill — ideal. Receives the most light throughout the day. The best position for how to grow aloe vera at home in most climates.
West-facing windowsill — good. Receives afternoon sun, which suits aloe vera well.
East-facing windowsill — acceptable. Morning sun only, but aloe vera can manage.
North-facing windowsill — not recommended. Too little light for aloe vera to thrive long-term.
Moving outdoors in summer
From May to September, you can bring your plant outdoors without any problems, but do bring it back inside in the evening when nights turn cold. A summer outdoors in a sunny, sheltered spot transforms aloe vera — the extra light and airflow produce noticeably healthier, more compact growth and increases pup production.
Grow lights in winter
In winter when natural light is scarce, a basic LED grow light positioned 15–30cm above the plant for 12–14 hours a day compensates effectively. Keep it under a grow light in the winter, then move it outdoors to soak up the sun in the summer.
6. How to Plant Aloe Vera Step by Step {#planting}
Whether you’re potting up a new purchase or repotting an existing plant, here’s exactly how to grow aloe vera at home from the planting stage:
Step 1 — Choose your pot Select a terracotta pot with drainage holes, only slightly larger than the root ball of your plant.
Step 2 — Prepare the soil Fill the pot about two-thirds full with cactus compost or your homemade well-draining mix.
Step 3 — Position the plant Place the aloe vera in the centre of the pot. Ensure that the crown (where the leaves meet the roots) sits slightly above the soil line, to keep the base from rotting.
Step 4 — Fill and firm Fill in the remaining space with soil around the roots, pressing down firmly but gently to remove large air pockets and stabilise the plant.
Step 5 — Add top dressing Add a thin layer of horticultural grit around the base of the plant to keep the crown dry.
Step 6 — Wait before watering For the first few days after planting or repotting, avoid watering your aloe plant so the roots have time to repair themselves. Wait 3–5 days before the first watering to allow any damaged roots to heal and reduce rot risk.
Step 7 — Position in bright light Place on your sunniest windowsill. That’s it — your aloe vera is planted.
7. How to Water Aloe Vera Correctly {#watering}
Watering is where most people go wrong when learning how to grow aloe vera at home. The rules are simple but must be followed consistently.
The golden rule: less is always more
Aloe thrives in dry soil, plus it stores water in its leaves, so it doesn’t need a lot of additional water. In fact, overwatering is the top reason aloe plants die.
When in doubt, do not water. Aloe vera can recover from underwatering — it draws on the reserves stored in its leaves. It cannot recover from root rot caused by overwatering.
How to know when to water
Allow the top third of potting mix to dry out between waterings. For example, if your plant is kept in 6 inches of growing medium, allow the top 2 inches to dry out before watering again. Use your finger to test the dryness of the soil.
The finger test: push your finger 2–3cm into the compost. If it feels damp at all, wait. If it’s completely dry at that depth, water thoroughly.
How often to water
Generally speaking, plan to water your aloe plant about every 2–3 weeks in the spring and summer and even more sparingly during the fall and winter.
In winter, monthly watering is often sufficient — sometimes even less. Aloe vera is dormant in cold months and uses almost no water.
How to water correctly
Water thoroughly — pour water slowly until it drains freely from the drainage holes. Then stop. Do not water again until the soil has dried out as described above.
Make sure you let the water drain away fully — do not let the plant sit in water as this may cause the roots to rot. Empty the saucer 30 minutes after watering.
Signs you’re overwatering vs underwatering
An overwatered plant might have yellow leaves that fall apart, while underwatered plants have thin, curled leaves.
Overwatered aloe: Soft, mushy leaves. Yellow or translucent lower leaves. Brown, mushy base. Soggy soil that doesn’t dry out.
Underwatered aloe: Thin, slightly wrinkled leaves. Leaves curling inward. Very light pot when lifted. Completely bone-dry soil.
8. Temperature and Humidity {#temperature}
Understanding temperature requirements is an important part of how to grow aloe vera at home in different climates.
Ideal temperature range
Aloe vera does best in temperatures between 55° and 80°F (13° and 27°C). The temperatures of most homes and apartments are ideal.
Most standard home temperatures suit aloe vera perfectly — which is one reason it makes such an excellent houseplant. It’s comfortable where you’re comfortable.
Cold sensitivity
Aloe vera cannot tolerate frost. When temperatures shift below 50°F (10°C), it’s time to bring aloe back inside. If you move it outdoors in summer, watch the weather and bring it in before autumn nights turn cold.
Humidity
Aloe vera actively prefers low humidity — consistent with its desert origins. Standard indoor humidity levels suit it well. Bathrooms and kitchens can be problematic if they’re consistently steamy. Do not mist aloe vera — unlike most tropical houseplants, it does not benefit from misting and the extra moisture can encourage rot.
9. Feeding Your Aloe Vera {#feeding}
Feeding is the least demanding part of how to grow aloe vera at home — aloe vera genuinely prefers lean conditions and needs very little supplemental nutrition.
Fertilise sparingly — no more than once a month — and only in the spring and summer with a balanced houseplant formula mixed at half strength.
This is important: full-strength fertiliser can damage aloe vera’s roots. Always dilute to half the recommended dose.
In autumn and winter, stop feeding entirely. A dormant aloe vera cannot use additional nutrients and excess fertiliser in the soil can cause root burn.
Best feed options
- Cactus and succulent liquid fertiliser — formulated specifically for the nutritional needs of succulents
- Worm castings as top dressing — add worm castings as a top dressing a couple of times a year during the growing season for gentle nutrition. One of the safest, most natural ways to feed aloe vera at home
- Balanced liquid fertiliser at half strength — a general-purpose liquid feed diluted to 50% of the recommended dose
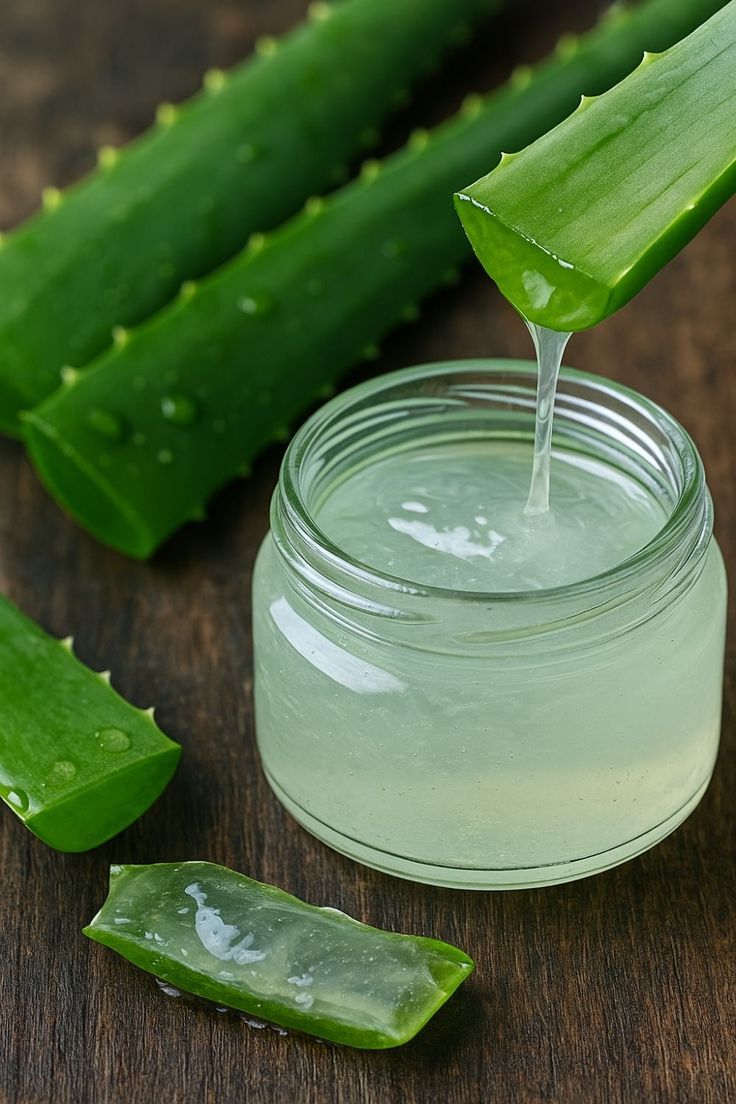
10. How to Harvest Aloe Vera Gel at Home {#harvesting}
One of the most rewarding parts of learning how to grow aloe vera at home is harvesting the gel for personal use. Here’s exactly how to do it correctly:
Which leaf to harvest
Always harvest the outermost, lowest leaves first — these are the oldest and most gel-rich. Never harvest from the centre of the plant where new growth emerges.
Step-by-step harvest guide
Step 1: Select a mature outer leaf — at least 7–10cm long and plump with gel.
Step 2: Use clean scissors or a sharp knife to cut the leaf cleanly at its base, as close to the stem as possible.
The cut leaf may ooze for a short time, but a natural latex within the aloe should seal things within a few hours.
Step 3: Stand the leaf upright in a glass for 10–15 minutes. This allows the yellow latex just beneath the skin — which has a laxative effect and should not be used — to drain away.
Step 4: Lay the leaf flat and slice off the serrated edges. Then slice lengthways to expose the clear inner gel.
Step 5: Scoop out the clear gel with a spoon. Use immediately or store in an airtight container in the fridge for up to one week.
Important warnings about aloe gel
The gel from aloe vera leaves can be used topically but should NOT be eaten by people or pets. It can cause unpleasant symptoms such as nausea or indigestion and may even be toxic in larger quantities.
The yellow latex layer (between the outer skin and the inner gel) should always be removed and discarded — this is the compound with laxative properties.
Uses for fresh aloe vera gel
- Soothing sunburn and minor burns immediately
- Treating insect bites and skin irritation
- Natural moisturiser for face and body
- Soothing razor burn and skin redness
- Hair mask for scalp health
- Adding to homemade skincare products
11. How to Propagate Aloe Vera from Pups {#propagating}
Propagating pups is the most satisfying part of how to grow aloe vera at home — turning one plant into many, completely free.
What are aloe pups?
Mature aloe vera plants occasionally produce smaller plants called pups around the larger mother plant. These are genetically identical baby aloes that grow from the mother plant’s root system. A healthy, well-established mother plant produces pups regularly — especially when slightly root-bound and receiving good light.
When to separate pups
To transplant aloe babies, wait until they reach about 3 inches tall, then gently dig them up. Pups separated too early — before they have their own root system — struggle to establish. Wait until they’re clearly a distinct plant with several of their own leaves.
How to separate and pot pups
Step 1: Remove the mother plant from its pot to expose the root system.
Step 2: Locate the pup and trace its connection to the mother plant. You may have to cut a stem attaching the pup to the mother plant; if so, take care not to cut roots on the baby plant.
Step 3: Gently separate the pup, preserving as many of its own roots as possible.
Step 4: Leave separated pups to dry in a warm spot for 24 hours — this allows the cut end to callous over and dramatically reduces rot risk when potted.
Step 5: Plant each baby in a small pot (around 2 inches), burying it so soil reaches the base of the first leaf. Use the same well-draining cactus mix as the mother.
Step 6: Water after two days, then continue to water once a week if soil dries out.
Step 7: Only expose them to bright but indirect light initially. This protects the top growth and the roots, giving them the best chance to get established.
12. When and How to Repot {#repotting}
Knowing when to repot is an important part of how to grow aloe vera at home long-term.
Signs your aloe vera needs repotting
- Roots are visibly growing out of the drainage holes
- The plant is visibly tipping over — becoming top-heavy relative to the pot
- Pups have appeared around the base and are crowding the mother plant
- The plant has stopped growing despite good light and appropriate watering
- It has been more than 2–3 years since the last repot
How to repot
Repot your aloe vera plant in a wider container when it begins to outgrow its pot. This keeps it from tipping over.
Choose a new pot only one size larger than the current one — remember, too large a pot causes waterlogging. Use fresh cactus compost. Follow the planting steps above. Wait 3–5 days before watering after repotting.
Best time to repot
Spring is the ideal time — as the plant comes out of winter dormancy and growth is accelerating. Repotting in autumn or winter when growth has slowed is harder on the plant.
13. Common Aloe Vera Problems and Fixes {#problems}
Brown, mushy leaves and base
Cause: Overwatering and root rot — by far the most common problem when growing aloe vera at home. Fix: Remove from pot immediately. Trim away all brown, mushy roots with clean scissors. Leave roots to dry for 24 hours. Repot in fresh, dry cactus compost in a clean pot. Do not water for one week. Reassess your watering habits entirely.
Yellowing leaves
Cause: Usually overwatering. Can also be too little light or root-bound conditions. Fix: Check soil — if damp, allow to dry completely before next watering. Move to brighter light. Check if repotting is needed.
Leggy, stretched growth reaching toward the light
Cause: Insufficient light. The plant is reaching toward the nearest light source. Fix: Move immediately to the brightest available windowsill. A south-facing position is ideal. Consider a grow light in winter.
Brown leaf tips
Cause: Most commonly underwatering, low humidity, or fluoride in tap water. Fix: Water more consistently (but don’t overcompensate). Use filtered or rainwater if fluoride is suspected.
Leaves turning red or orange
Cause: Too much direct sun or sudden temperature stress. Slightly stressed but not dying. Fix: Move away from intense direct afternoon sun. Provide bright indirect light instead.
Flat, thin, wrinkled leaves
Cause: Underwatering — the plant is drawing on its leaf reserves. Fix: Water thoroughly immediately. The leaves should plump back up within a few days.
White, crusty deposits on leaves
Cause: Mineral deposits from hard tap water on the leaf surface. Fix: Wipe leaves with a damp cloth. Switch to filtered or rainwater to prevent recurrence.
No pups appearing
Cause: Plant may be too young (aloe vera rarely pups before 3–4 years old), in too large a pot, or not receiving enough light. Fix: Ensure the plant is slightly root-bound (smaller pot is better for pup production), receiving maximum light, and is at least 3–4 years old. A summer outdoors dramatically increases pup production.
14. Growing Aloe Vera Outdoors {#outdoors}
While this guide focuses on how to grow aloe vera at home indoors, it’s worth knowing the options for outdoor growing.
This moisture-rich plant thrives outdoors year-round only in the very warmest regions (zones 9 to 10). In other areas, aloe grows best indoors as a houseplant, with some gardeners moving it outdoors for summer.
In the UK and most of northern Europe, aloe vera cannot survive outdoors year-round — it is frost-tender and will be killed by freezing temperatures. However, from May to September you can bring your plant outdoors without any problems.
A summer outdoors in a sheltered, sunny spot produces noticeably healthier growth, more compact rosettes, increased gel production, and significantly more pups than indoor growing alone. Move back indoors before night temperatures drop below 10°C.
15. Aloe Vera Uses at Home {#uses}
One of the joys of knowing how to grow aloe vera at home is the daily practical uses of fresh gel:
Skin and body
- Sunburn — the most famous use. Apply fresh gel generously to affected skin immediately. Cool, soothing, and anti-inflammatory.
- Minor burns — from cooking or hot beverages. Apply gel promptly to reduce pain and inflammation.
- Moisturiser — fresh aloe gel is an excellent lightweight moisturiser for oily or combination skin.
- Acne treatment — antibacterial and anti-inflammatory properties make aloe gel effective for spot treatment.
- Razor burn — apply after shaving to reduce redness and irritation.
- Insect bites — immediate cooling and itch relief.
Hair
- Scalp treatment — massage fresh gel into the scalp to soothe irritation and dandruff.
- Hair mask — apply from root to tip before washing as a deep conditioning treatment.
- Styling gel — fresh aloe gel is a natural, alcohol-free styling product that defines without crunching.
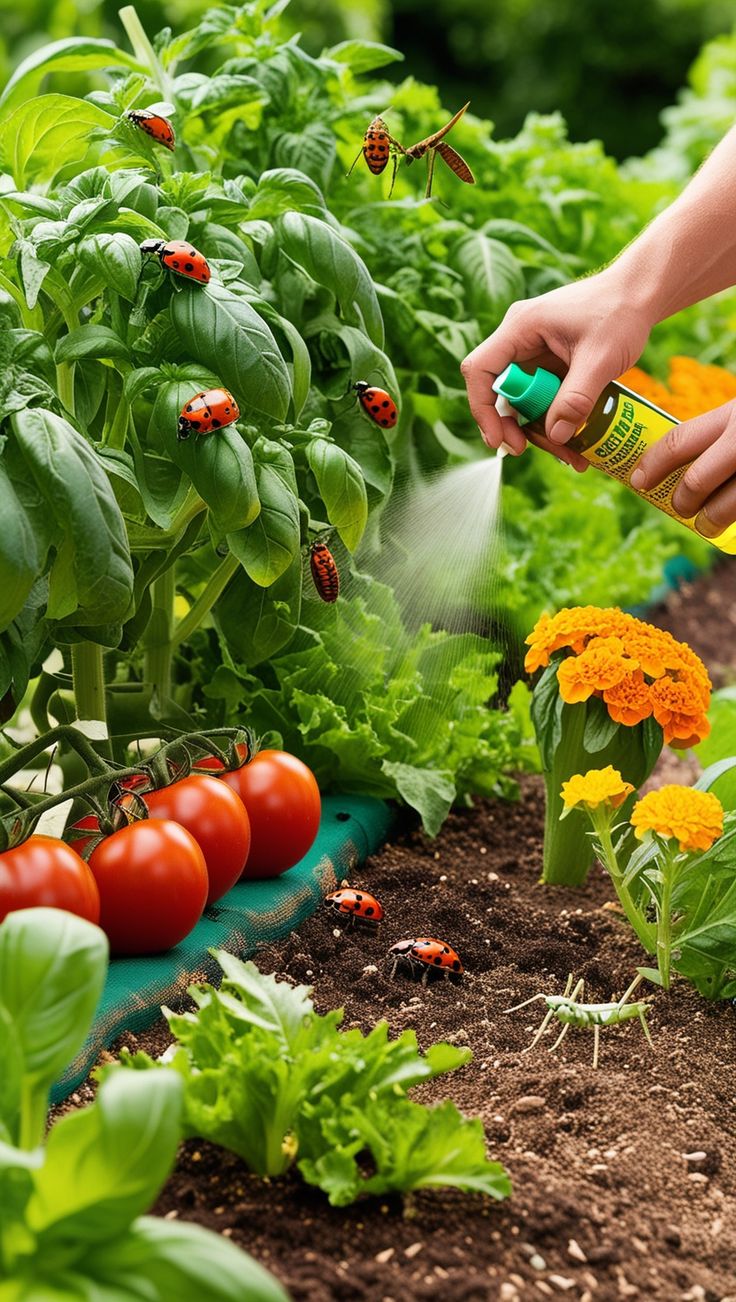
Garden
- Natural rooting hormone — aloe vera contains natural plant hormones. Dip cuttings in fresh gel before planting to stimulate root growth and reduce transplant shock.
- Soil drench for seedlings — dilute fresh aloe gel in water (1 tablespoon per litre) and water new seedlings to help them establish.
- Pest deterrent — diluted aloe spray on plant leaves can deter some soft-bodied pests.
Final Thoughts
Learning how to grow aloe vera at home is one of the best decisions any plant beginner can make. Get the three fundamentals right — well-draining soil, bright light, and infrequent watering — and aloe vera will reward you for years.
It is genuinely one of the most forgiving, useful, and long-lived plants you can bring into your home. Start with one healthy plant from a garden centre, place it on your sunniest windowsill, resist the urge to overwater, and watch it quietly thrive.
Within a few years, you’ll have a mature plant producing free gel, multiplying into new plants, and purifying your bedroom air every single night.
That is the aloe vera promise — and it delivers every time.
Happy growing, Sajjad
Read these next:
- Best Air Purifying Plants for Bedroom: 12 Plants That Clean Your Air While You Sleep
- Best indoor plants for air quality — the complete science-backed guide
- 15 best indoor plants for beginners
- How to grow herbs indoors all year round