Broccoli can look like a difficult vegetable because it wants cool weather, steady growth, and good timing. In practice, most broccoli problems come from a few preventable mistakes: sowing too late, letting seedlings become stressed, planting in poor soil, allowing moisture to swing from very dry to very wet, or waiting too long to harvest.
If you understand those pressure points, broccoli becomes much easier to manage. You do not need perfect conditions. You need a realistic planting window, healthy seedlings, fertile soil, steady moisture, and regular checks for caterpillars and other pests.
This guide explains how to grow broccoli from seed from start to finish. It covers seed starting, transplanting, spacing, watering, feeding, pest prevention, head development, harvesting, side shoots, and troubleshooting. The focus is on practical decisions you can use in a home garden, raised bed, or large container.
Understand What Broccoli Needs Before You Sow
Broccoli is a cool-season crop. It usually grows best when young plants can develop in mild conditions and form heads before prolonged heat arrives. Exact planting dates vary by climate, so use your local frost dates and seasonal temperatures rather than one national calendar.
The USDA Plant Hardiness Zone Map can help you understand broad winter temperature patterns, but your local extension service is often more useful for vegetable planting dates because it reflects regional spring and fall conditions.
Broccoli generally needs:
- Full sun for strong growth, with some relief from extreme afternoon heat in warm regions.
- Loose, fertile soil that drains well but holds useful moisture.
- Consistent watering during active growth.
- Enough nitrogen for leaves and stems without excessive feeding late in the crop.
- Cool enough weather for the plant to form a firm central head.
- Regular pest checks, especially for caterpillars that feed on brassica leaves.
Broccoli belongs to the brassica family with cabbage, kale, cauliflower, Brussels sprouts, and related crops. If you already grow those vegetables, many of the same soil and pest-management practices apply.
Choose the Right Broccoli Variety
Variety choice affects how fast the crop matures, how well it handles heat or cold, how large the central head becomes, and how many side shoots you may harvest later.
Read the seed packet for days to maturity and temperature notes. Do not choose only by head size. A faster variety may perform better if your cool season is short. A variety known for side shoots can give a longer harvest even if the first head is not huge.
| Situation | Useful Variety Trait | Why It Helps |
|---|---|---|
| Short cool spring | Earlier maturity | Allows heading before strong heat |
| Mild fall season | Reliable cool-weather performance | Supports steady autumn growth |
| Small garden | Compact habit | Uses bed space efficiently |
| Long harvest goal | Strong side-shoot production | Extends harvest after the main head |
| Warm region | Better heat tolerance | Reduces early stress, though timing still matters |
When to Start Broccoli Seeds
For a spring crop, many gardeners start broccoli indoors several weeks before the last expected frost, then transplant hardened seedlings while weather is still cool. For a fall crop, sowing often starts in summer so plants mature as temperatures decline.
Do not rely on the calendar alone. Work backward from the period when you want mature plants forming heads. If summers arrive quickly, give plants enough time to establish before heat. If winters become severe early, start the fall crop soon enough for plants to size up first.
Spring strategy
- Check your average last frost date.
- Read the seed packet for seedling and maturity timing.
- Start seeds indoors early enough to produce sturdy young plants.
- Harden seedlings before outdoor planting.
- Transplant while the weather is cool but the soil is workable.
Fall strategy
- Estimate your first hard freeze and normal autumn temperatures.
- Count backward using the variety’s maturity period plus extra establishment time.
- Start seeds where they can stay cool enough to germinate.
- Protect young transplants from intense summer sun during establishment.
- Let the crop mature as temperatures become milder.
How to Start Broccoli Seeds Indoors
Use clean seed-starting mix rather than heavy garden soil. A fine, well-drained mix gives small roots more oxygen and reduces compaction around the seed.
Step 1: Fill containers
Fill cell trays or small pots with pre-moistened seed-starting mix. The mix should feel evenly damp, not dripping wet.
Step 2: Sow the seeds
Plant seeds at the depth shown on the packet. Cover lightly and water gently so the seed is not displaced.
Step 3: Keep moisture steady
Do not let the mix dry completely during germination. At the same time, avoid keeping trays saturated. Constant wetness can weaken seedlings and encourage disease.
Step 4: Provide strong light
Once seedlings emerge, give them bright light. Weak light produces long, thin stems that bend easily. If using grow lights, position them according to the manufacturer’s guidance and adjust as seedlings grow.
Step 5: Keep seedlings from becoming crowded
If several seedlings share one cell, thin them before roots become badly tangled. Good airflow also helps foliage dry after watering.
Step 6: Feed lightly if needed
Seed-starting mixes often contain little nutrition. Once seedlings have true leaves, a diluted balanced fertilizer may be useful if growth looks pale or slow. Follow the product label instead of guessing at a stronger dose.
What Healthy Broccoli Seedlings Look Like
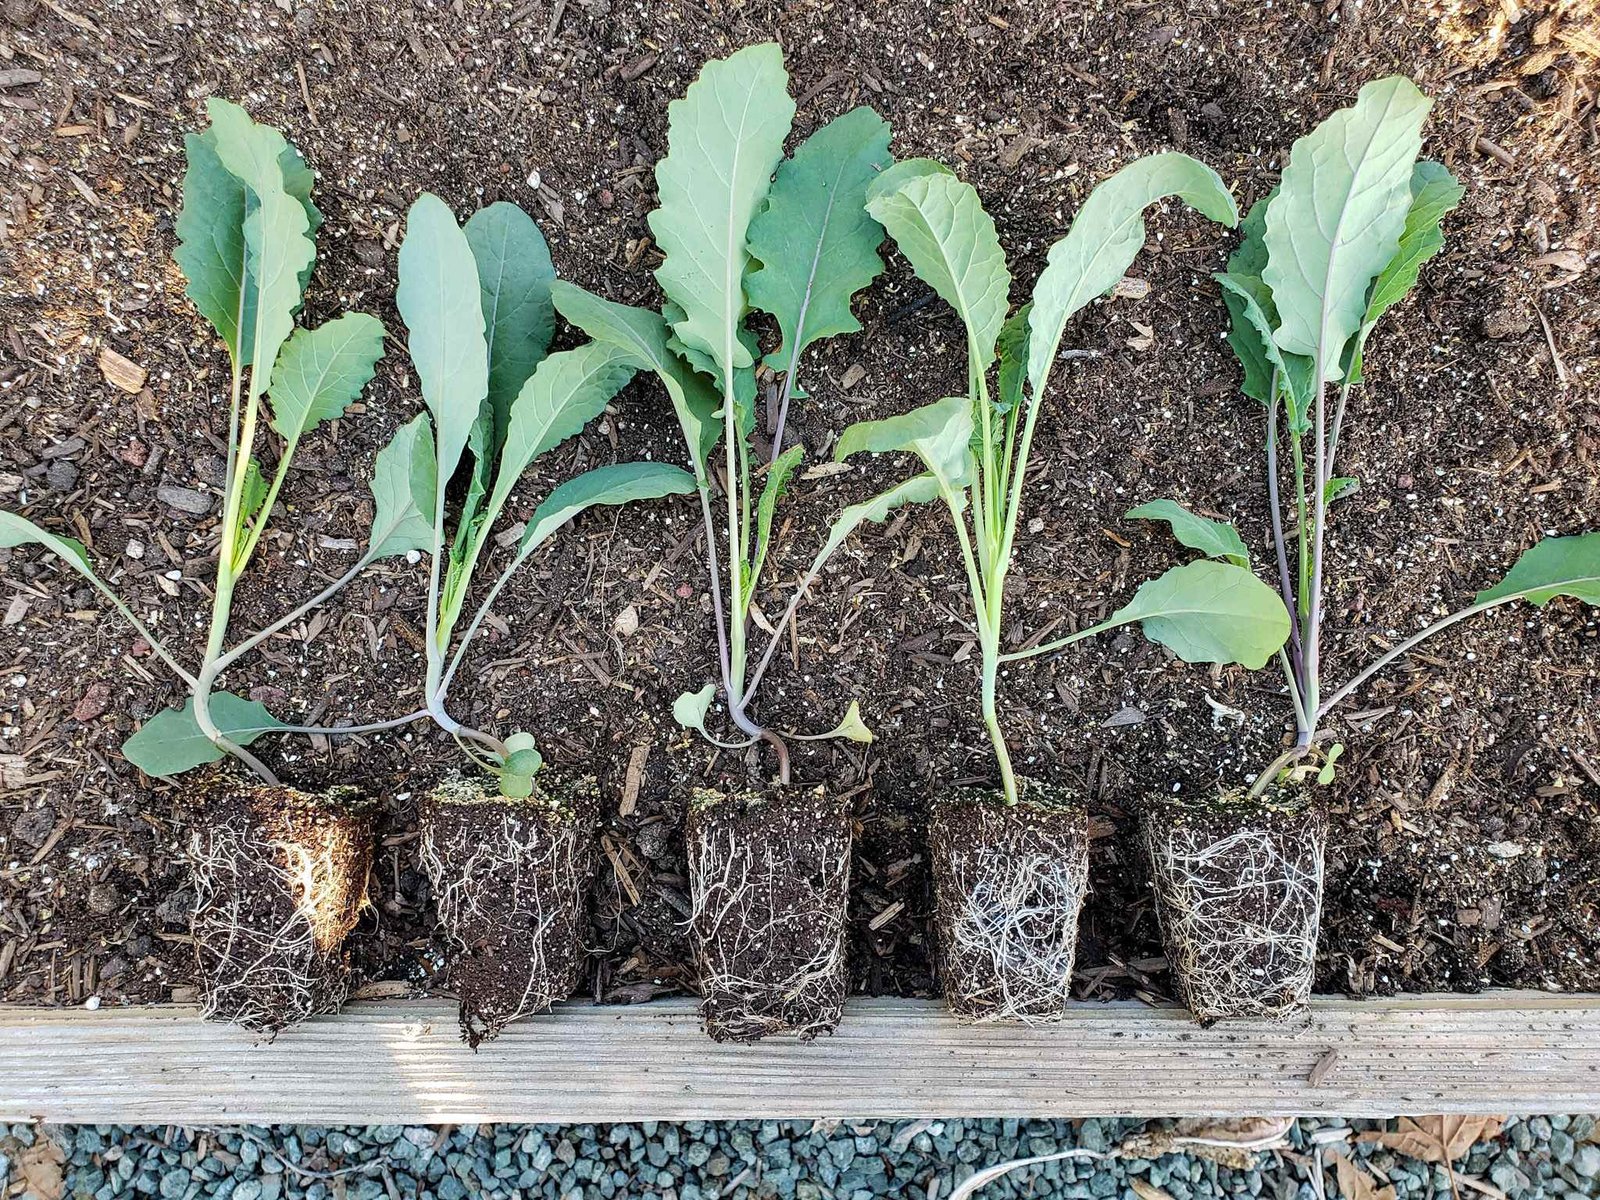
A transplant-ready seedling should be compact, green, and actively growing. It should not be badly root-bound or stretched from weak light.
Look for:
- A firm stem rather than a long, floppy one.
- Several healthy true leaves.
- No obvious caterpillar, aphid, or disease damage.
- Roots that hold the mix together but have not formed a tight solid mat.
- New growth at the center.
If seedlings become stressed for a long time, broccoli may never perform as well as a plant that grew steadily from the start. Avoid keeping mature seedlings in tiny cells for weeks while waiting for bed space.
Harden Off Broccoli Before Transplanting
Indoor seedlings are not ready for full outdoor exposure on the first day. Wind, direct sun, cooler nights, and faster moisture loss can damage tender leaves.
Harden them gradually over roughly a week or longer depending on conditions. Begin with a protected outdoor period, then increase exposure. Bring plants back to shelter if strong wind, frost, or harsh heat is expected.
During hardening, watch the potting mix. Small cells can dry much faster outdoors than they did inside.
Prepare the Garden Bed
Broccoli grows best in fertile soil with reliable drainage. Before planting, remove weeds and loosen compacted areas without pulverizing wet soil.
If you have not tested the bed, a soil test can help you avoid unnecessary fertilizer or lime. The USDA Natural Resources Conservation Service provides useful soil-health information, while local extension laboratories often provide practical testing recommendations for home gardens.
Add finished compost if the soil needs organic matter. Compost can improve structure and water management, but it is not a substitute for understanding nutrient levels. Some composts are nutrient-rich, while others contribute more organic matter than fertility.
How to Transplant Broccoli
Choose a mild planting day
A cloudy day or late afternoon can reduce immediate transplant stress. Avoid setting tender plants into hot, dry soil during intense midday sun.
Space plants for airflow and head development
Follow the seed packet for your variety. Crowding creates competition and makes it harder to inspect leaves for pests. Wider spacing can support larger plants, while closer spacing may produce smaller heads in intensive beds.
Plant at the correct depth
Set the root ball into prepared soil and firm gently around it. Do not bury the growing point. If a seedling is slightly leggy, you can often set it a little deeper, but avoid covering healthy leaves.
Water immediately
Water around the root zone so soil settles against the roots. For the first several days, check moisture more often than you would for established plants.
Watering Broccoli Correctly
Broccoli performs best with steady soil moisture. Large swings can slow growth and stress plants during head formation.
Instead of watering by a fixed number of minutes, check moisture several centimeters into the soil. Water deeply enough to wet the active root zone, then allow suitable drainage.
Mulch can help reduce surface evaporation and soil splash. Keep mulch slightly away from the stem so the crown is not packed against wet material.
Signs the crop may be too dry
- Leaves droop and remain limp after the hottest part of the day.
- Soil is dry below the surface.
- Growth slows during active weather.
- Head development stalls while plants are otherwise healthy.
Signs the bed may stay too wet
- Soil remains saturated for long periods.
- Lower leaves yellow while growth weakens.
- Roots smell sour or appear damaged.
- Water stands around plants after routine irrigation.
How to Fertilize Broccoli Without Overdoing It
Broccoli is a fairly hungry crop because it must build a large leaf system before producing a head. The leaves are not wasted growth; they support the plant’s ability to make the edible flower head.
The safest approach is to use a soil test and follow fertilizer label directions. If the bed is fertile and amended with mature compost, you may need less supplemental feeding than a low-fertility sandy bed.
A practical rule is to watch growth. Pale plants with slow development may need nutrition, but yellow leaves can also come from poor drainage, root stress, or pests. Diagnose before adding fertilizer.
Keep Weeds Under Control
Young broccoli competes poorly with aggressive weeds. Remove weeds while they are small so you do not disturb broccoli roots later.
A thin organic mulch can suppress new weeds and help stabilize soil moisture. In a closely planted bed, hand pulling may be safer than deep hoeing near stems.
Common Broccoli Pests and How to Manage Them
Cabbage worms and other caterpillars
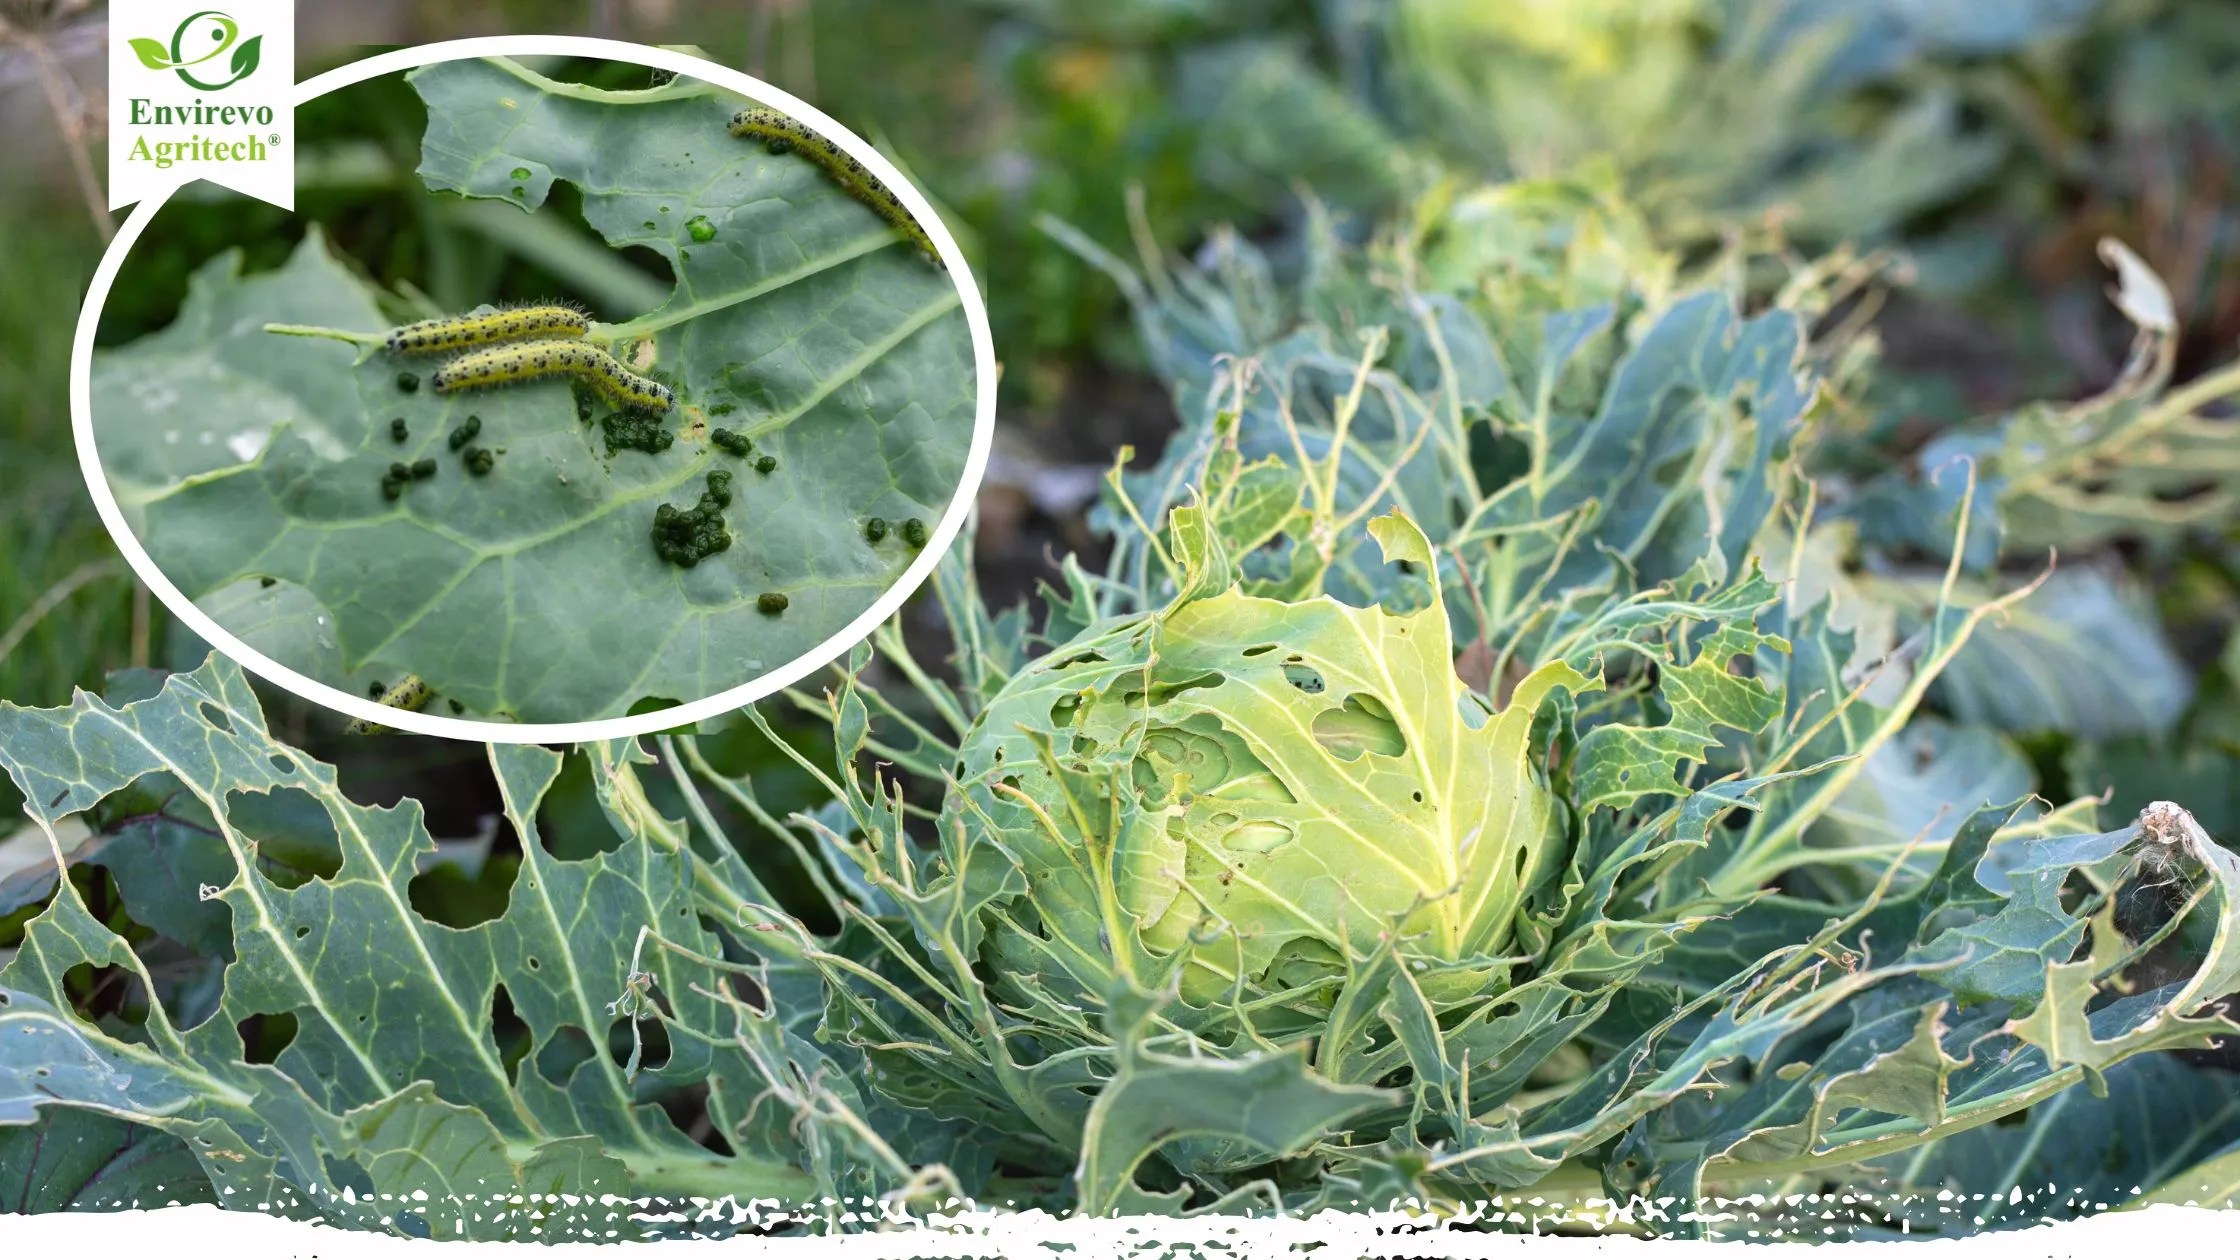
Check the undersides of leaves and the center of the plant. Small holes often appear before severe damage becomes obvious. Hand-pick caterpillars in small gardens. Fine insect netting can prevent egg-laying if installed before pests reach the plants and sealed around the edges.
If you use a biological or conventional pesticide, identify the pest first and follow the label exactly. More product is not better.
Aphids
Aphids often collect on tender growth and inside developing heads. A firm stream of water can remove light infestations. Encourage beneficial insects and avoid unnecessary broad-spectrum spraying that kills natural predators.
Flea beetles
Small shot-like holes in young leaves may come from flea beetles. Healthy established plants can tolerate some damage, but seedlings may need protection with netting or other locally appropriate methods.
Slugs and snails
These pests can chew young transplants, especially in damp gardens. Reduce hiding places, inspect at dusk, and use targeted controls suitable for your garden if damage is significant.
Why Broccoli Sometimes Makes Small Heads
Small heads are usually a symptom of the plant’s history rather than one mistake on harvest day.
Common causes include:
- Seedlings stayed in small cells too long.
- Plants were stressed by heat soon after transplanting.
- The bed was low in fertility.
- Roots experienced repeated drying.
- Plants were crowded.
- A variety was planted outside its best season.
- Pest damage reduced healthy leaf area.
Focus on steady growth from seedling stage onward. Broccoli rarely responds well to a last-minute heavy fertilizer application after the plant has already been stressed for weeks.
What Causes Broccoli to Bolt
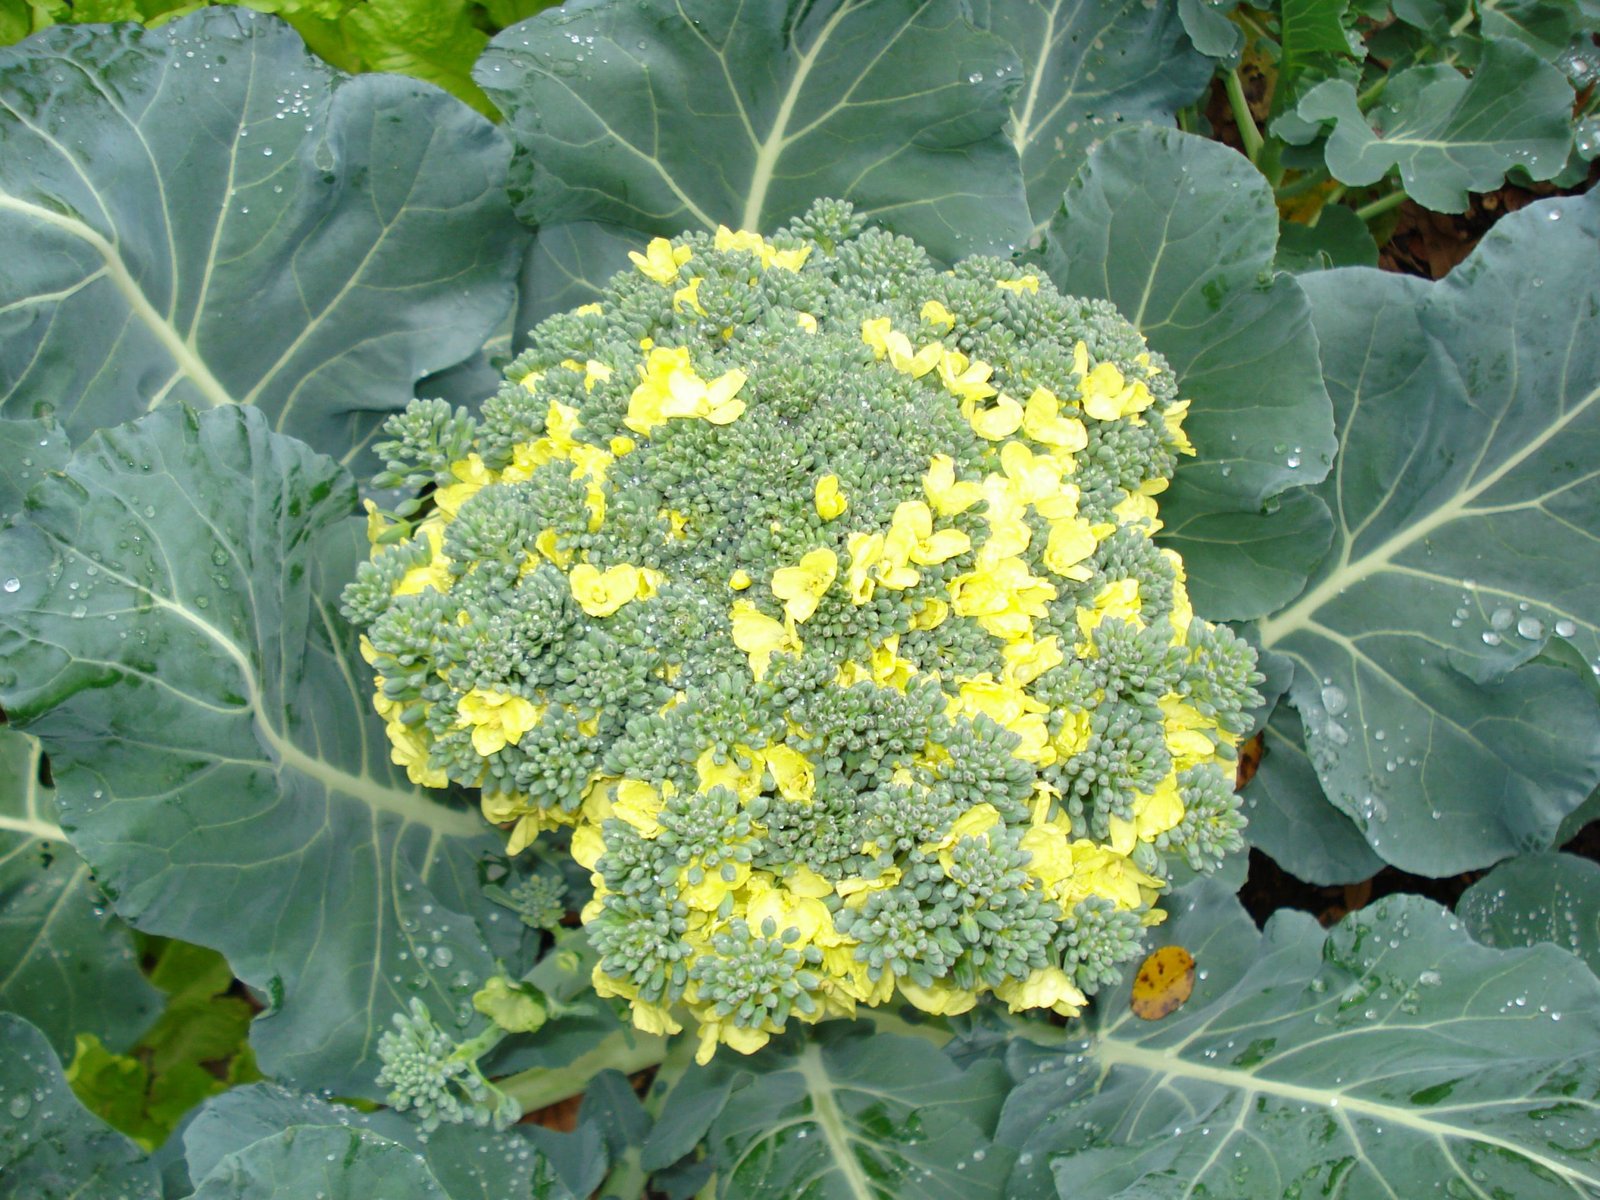
Bolting means the plant shifts quickly toward flowering. Broccoli heads are clusters of immature flower buds, so warm weather and stress can push those buds to open sooner than you want.
If buds begin loosening and yellow flowers appear, harvest immediately. The head may be smaller, but it is better to eat it now than wait for a larger head that will never develop.
To reduce premature flowering:
- Plant at the correct seasonal window.
- Avoid badly stressed transplants.
- Keep soil moisture steady.
- Use a variety suited to your climate.
- Harvest when buds are tight instead of waiting for maximum size.
When and How to Harvest Broccoli
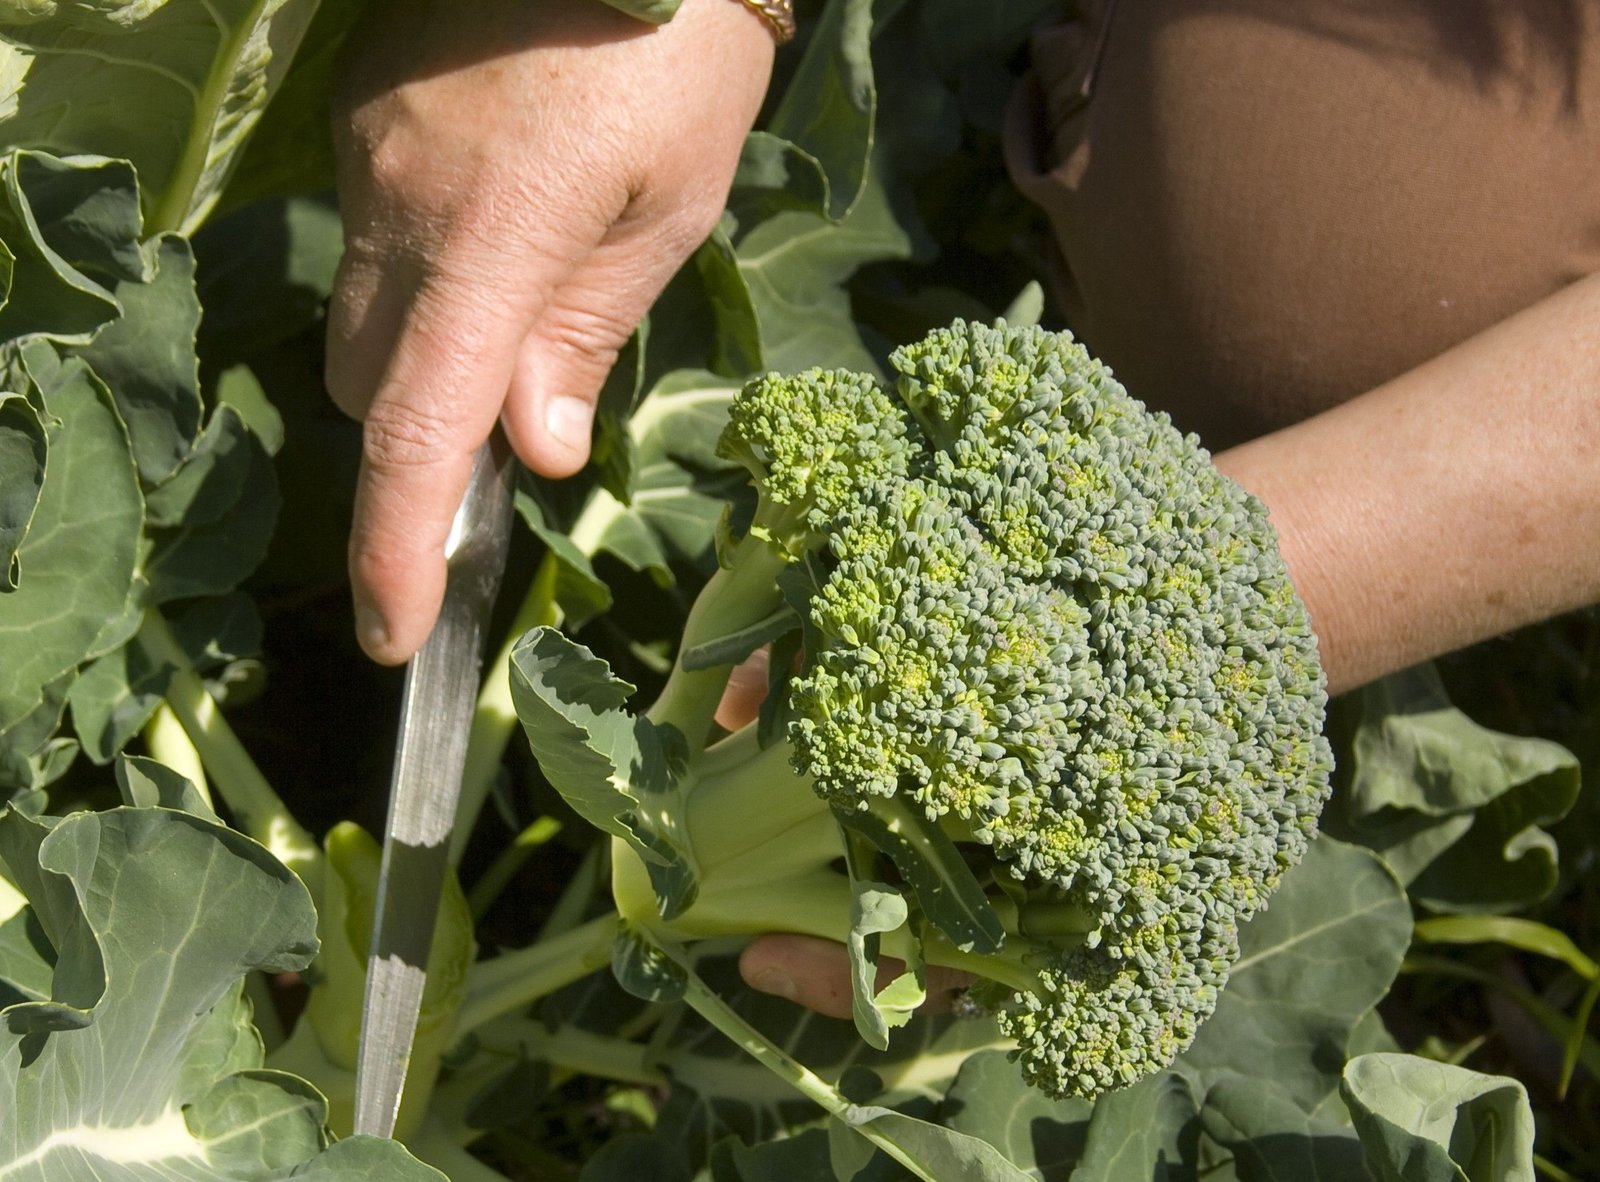
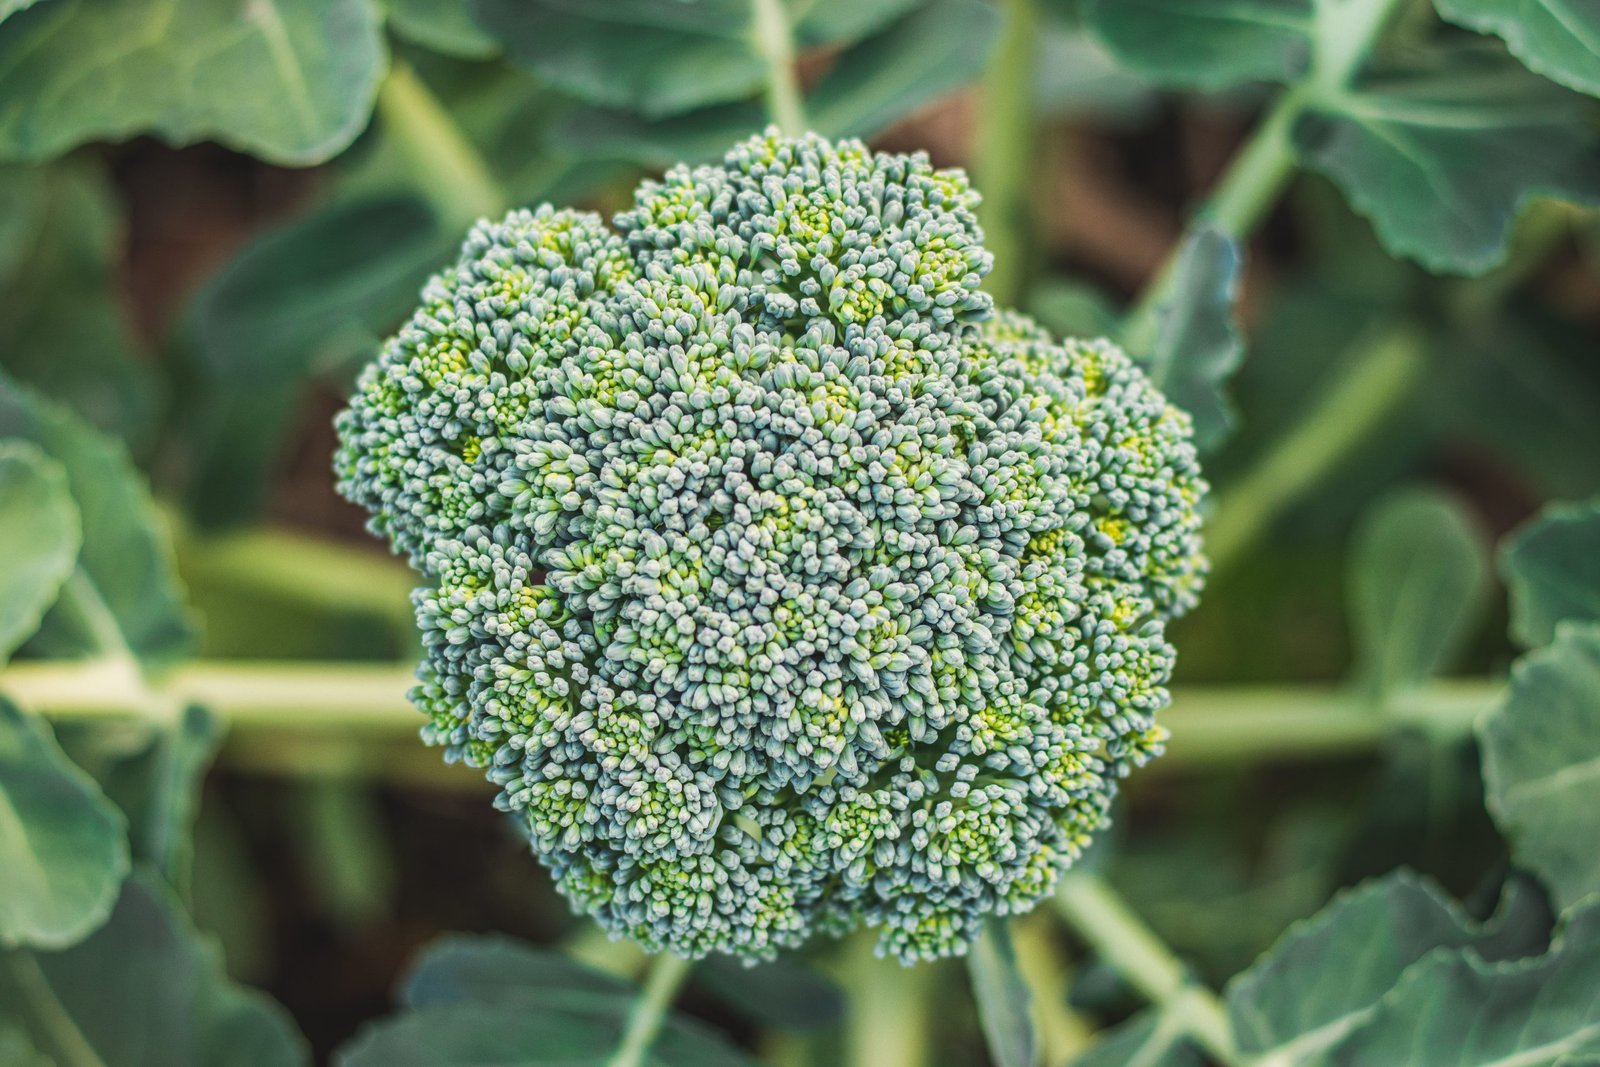
Harvest the main head when it is firm and the flower buds are still tight. Do not wait for yellow petals to open.
- Inspect the head every day as it nears maturity.
- Choose a clean, sharp knife.
- Cut the main stem below the head, leaving enough stem for cooking if desired.
- Leave the lower plant and healthy leaves in place.
- Continue watering and monitoring for side shoots.
Many varieties produce smaller shoots after the central head is removed. These side shoots can extend the harvest for weeks in suitable weather.
Real-World Example: A Four-Plant Raised Bed
Imagine a gardener with a sunny raised bed and a short spring. They start four broccoli plants indoors under a grow light. The seedlings grow compactly and are moved outdoors gradually over eight days.
Before planting, the gardener adds mature compost based on the bed’s known soil condition and spaces the plants so each has room for broad leaves. Drip irrigation supplies water near the root zone. A light straw mulch reduces drying.
Two weeks later, small caterpillar holes appear. Instead of spraying immediately, the gardener checks leaf undersides, removes several larvae, and installs fine insect netting. The plants continue growing without major damage.
As the weather warms, the gardener checks the developing heads daily. The largest head is harvested while tight rather than waiting another week for extra size. The plant remains in the bed and later produces several side shoots.
The successful part of this example is not one special product. It is the sequence: good timing, healthy seedlings, steady moisture, early pest checks, and prompt harvesting.
Broccoli Growing Checklist
- Choose a variety suited to your season.
- Start seeds early enough for cool-weather maturity.
- Give seedlings strong light.
- Do not keep mature seedlings trapped in tiny cells.
- Harden plants gradually before transplanting.
- Use fertile, well-drained soil.
- Space plants for airflow and leaf growth.
- Keep soil moisture consistent.
- Inspect leaves for caterpillars at least several times a week.
- Harvest before flower buds open.
- Leave the plant in place for possible side shoots.
Frequently Asked Questions
Can I grow broccoli in a container?
Yes, if the container is large enough for the variety and has good drainage. One healthy plant in a generous container often performs better than several crowded plants. Container soil dries faster than garden soil, so check moisture often.
Does broccoli need full sun?
Broccoli usually grows best with strong sun, but in hot climates some afternoon protection can reduce stress. Too much shade can create weak growth and smaller heads.
Why are my broccoli seedlings tall and thin?
Weak light is a common cause. Move seedlings to stronger light or adjust grow lights according to the fixture instructions. Crowding and excessive warmth can also contribute.
Can I eat broccoli leaves?
Healthy broccoli leaves are edible and can be cooked similarly to other brassica greens. Avoid leaves treated with any product that does not permit harvest according to its label.
Why did my broccoli make leaves but no head?
Possible causes include poor seasonal timing, heat, stress, excessive crowding, variety differences, or plants that have not reached maturity yet. Review the seed packet and the crop’s growing conditions before adding fertilizer.
Should I pull the plant after harvesting the main head?
Not immediately. Many broccoli plants produce useful side shoots after the main head is removed. Keep the plant healthy and watch for new shoots until weather or disease ends the crop.
Conclusion: Aim for Steady Growth, Not Perfect Conditions
Growing broccoli from seed becomes much easier when you stop treating head formation as a separate final step. The quality of the head reflects everything that happened earlier: seedling light, transplant timing, root space, soil fertility, moisture, temperature, and pest pressure.
Start with a variety that fits your season. Raise compact seedlings, harden them gradually, and transplant into fertile, well-drained soil. Keep moisture steady, check leaves for pests before damage becomes severe, and watch developing heads closely.
Most important, harvest while the buds are still tight. A firm head picked at the right time is better than a larger head left until flowers open. After cutting the main head, keep the plant growing and collect side shoots when they are ready.
That simple routine gives broccoli what it needs most: steady growth from seed to harvest and fewer sudden stresses along the way.